
Installation of Windows 10
This guide referes to Windows 10, however it's still valid for Windows 8.1 and also 11!
Downloading and flashing Windows 10
You can download Windows in different ways. In this guide we talk about Windows 10. So:
Macos
Requirement:
- Windows 10 ISO file
- An USB device
Download the appropriate ISO for your Country
Open Boot Camp Assistant and click on "Create a windows 10 device"
Wait until it finishes flashing, then boot on the USB.
Linux
Requirement:
- Windows 10 ISO file
- An USB device At the moment use https://github.com/WoeUSB/WoeUSB/tree/master
Windows
Requirement:
- MediaCreationTool
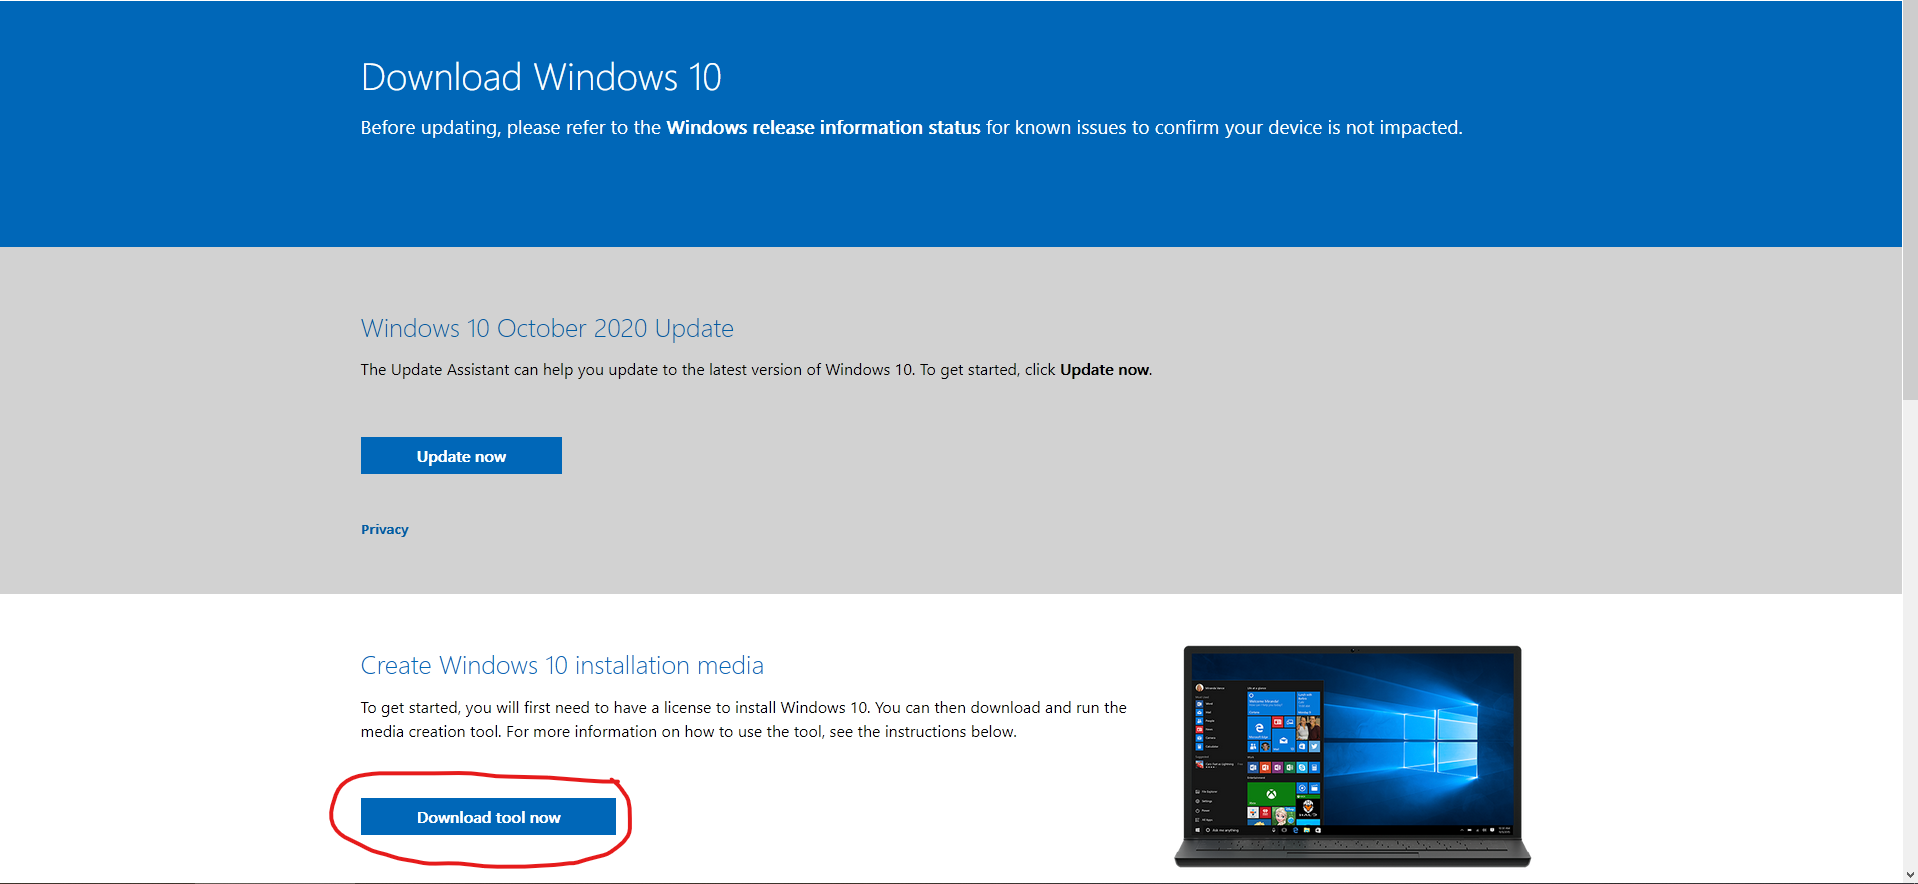
- Rufus
- An USB device
Open MediaCreationTool and download the ISO file for your system (32 or 64 bits).
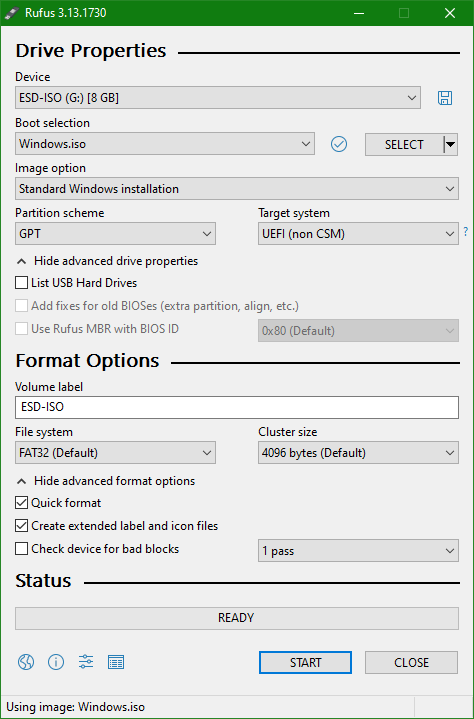
Open rufus, connect the usb and setup rufus with the appropriate settings for your system. Wait until it finishes of flashing, then boot on the USB.
UEFI
BIOS/legacy/CSM
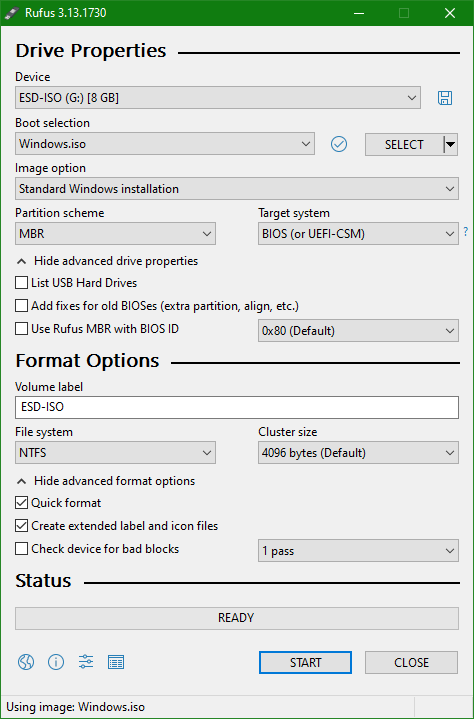
Wait until it finishes flashing, then boot on the USB.
Installing Windows 10
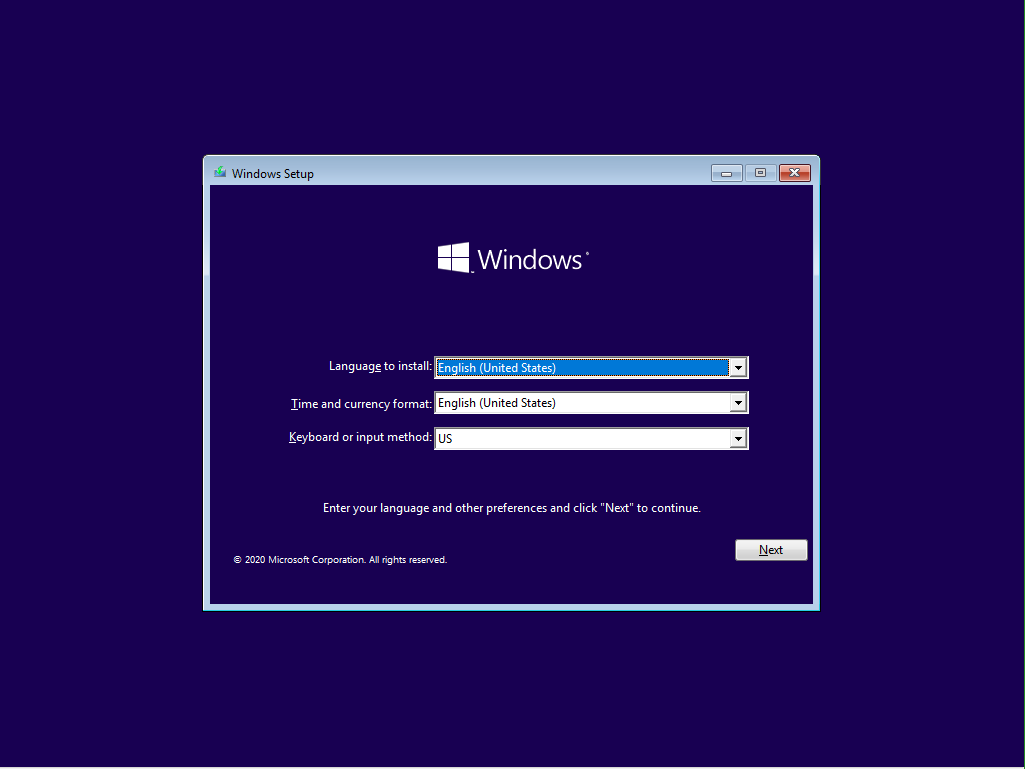
When the usb booted, you can chose what to do:
- Install Windows 10 automatically
- Install Windows 10 manually (only when there are problems or when you want to control the procedure)
Automatically
Follow the procedure printed on screen!

Manually
This guide it's planned for a full installation. If you want to do a dualboot you can create the partition as you want. To open a terminal window use the key combo SHIFT-F10
Find and remember your path to install.esd/install.wim file. I suppose that <path> it will be its path.
Creating partitions
You have to choose:
- Create the partitions automatically
- Create the partition manually
Automatically partitions
NOTE: This process can be followed only on blank disks.
Follow the procedure since appears this section:
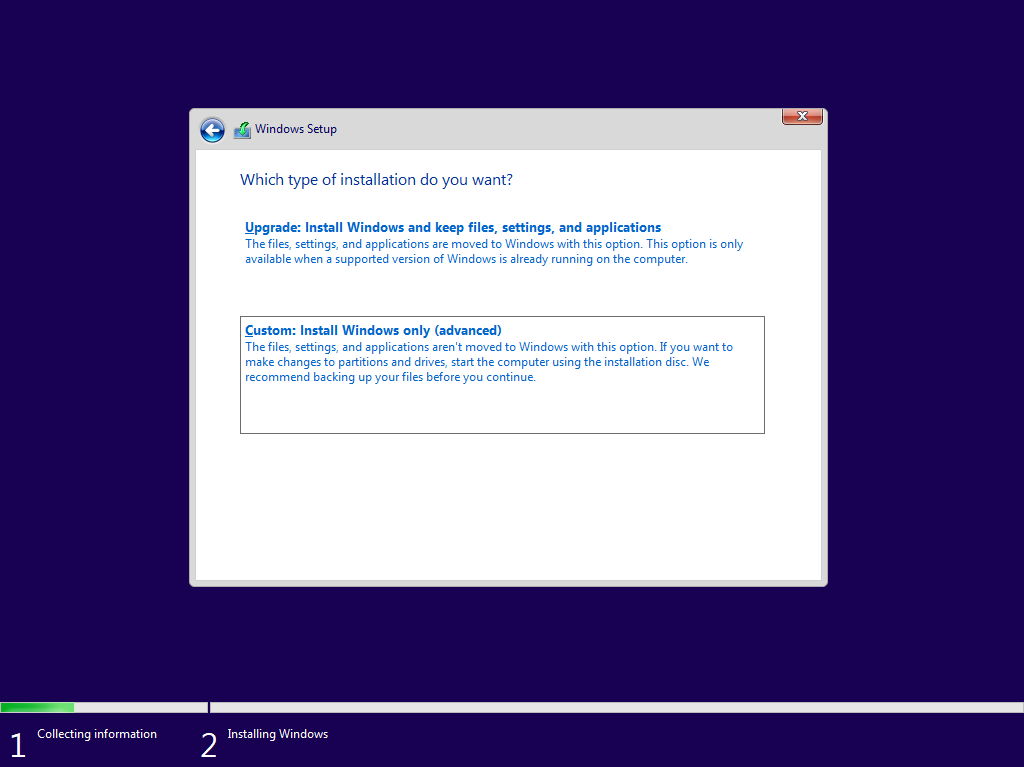
Select "Custom", remove all partitions and finally click on "Create". Windows will ask you a confirm, then you did it!
Manually partitions

Note
We won't use MSR because we don't need it. If you want you can also skip recovery partition, which is long and it might not be useful
You can customize the commands (SHIFT+F10 to open Command Prompt) to your disk layout. If you felt more confortful, you could create all your partition (specify the size) on the diskmanagement screen (see automatically) and then installing manually (only blank disks).
Type diskpart
Type list disk and remember the disk number where you want to install Windows
Type sel disk 0 where 0 is the number of your disk
Type clean to format the whole disk (optional)
Type convert gpt to convert the disk to GPT (it would give an error if it was already converted, no problem) (risk of lose your data!!!)
Type create part efi size 200 to create the EFI partition (default size 200 MB), then type format quick fs fat32 to format it and assign letter q to assign correctly our EFI partition.
Type create part primary size 128000 to create the main partition (default size = [total space] - 450MB of WinRE - 200MB of EFI. I remember that the size value must be in MB) --> default size = [total space] - 778MB, then type format quick to format it and assign letter c to assign correctly our drive.
After that we set up the recovery enviroment: type create part primary (default size 450, the remaining part of the disk), set id de94bba4-06d1-4d40-a16a-bfd50179d6ac to change the type of partition (primary-->WINRE, more infos here),gpt attributes 0x8000000000000001 to hide it,format quick to format it in NTFS.
Type exit to quit diskpart.
Install Windows
Type dism /get-wiminfo /wimfile:<path> to get the number of your edition.
Type dism /apply-image /imagefile:<path> /index:4 /applydir:c:\ to flash the WIM/ESD image to your disk where 4 is changed as you edition number.
Type bcdboot c:\windows /s q:\ to create the boot files on the EFI disk (Caution! if OpenCore was present, Windows cannot inject your EFI).
Reboot and hope everything work.