
On a filled non-OS related disk (Data disk)
This is quite easy, basically we'll just make some space for an EFI (if it doesn't exist already) and some for our macOS system.
Precautions
- BACKUP YOUR DATA
- If possible, disconnect or disable any other disk/drive in your system, as it may interfere with our process. (keep only the target disk and/or the boot OS disk where we will do the operations from)
- The drive isn't corrupted or have bad sectors
- Your system is on pure UEFI setup, no CSM/Legacy OS installed
- Stable power input
Situation this applies for
- A disk with data that is not related to windows or linux or macOS
- A disk that used to be for an OS but now it's just data
To start, we need to know what kind of partitioning scheme we're using, most new drives that are <1TB are usually MBR formatted (some 1TB drives still do) while anything bigger in size is GPT partitioned. As we saw before, macOS requires GPT and can't do without it.
Note: we do not speak of the MBR patch, that's a bad idea and really should not exist anymore since it doesn't make any sense when most 2006+ computers can easily boot a GPT drive without much issues.
Checking your disk partitioning scheme
In Windows
- Open Disk Manager
- Right click on the destination drive > Properties
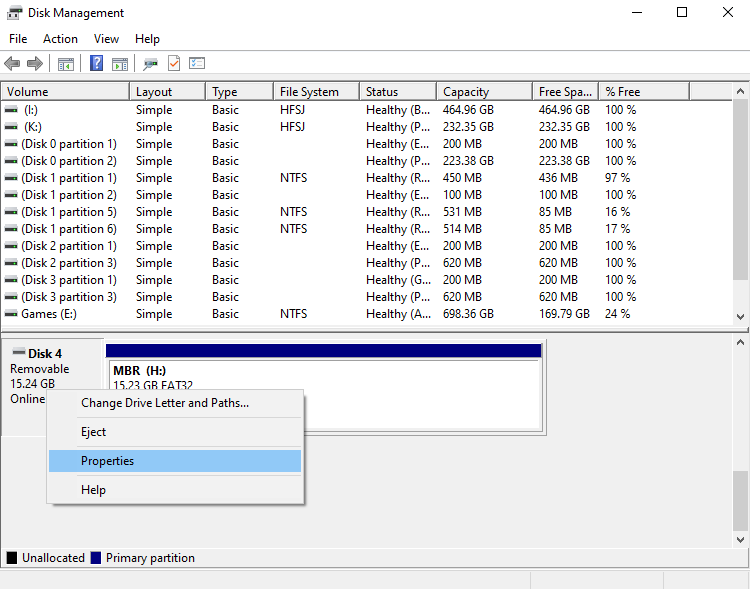
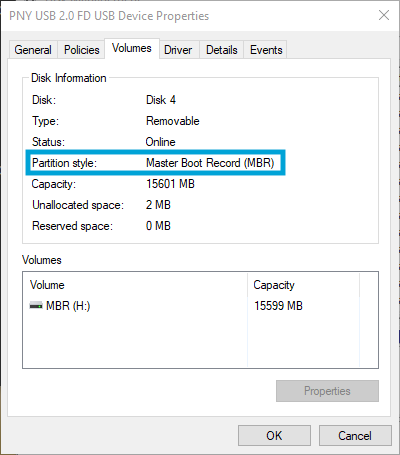
- Go to Volumes and check Partition Style
MBR drives will show:
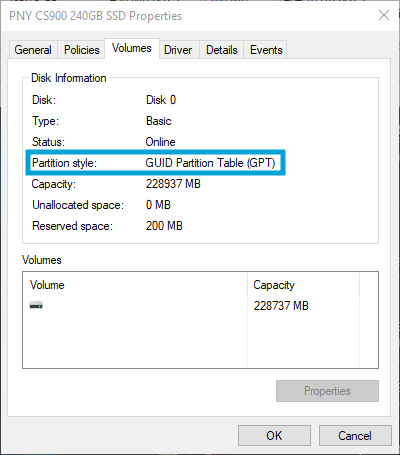
GPT drives will show:
In Linux
Download and install
gdiskif it's not already installedRun
lsblkto list your disks and partitions and check the identifiers (eg:/dev/sdaor/dev/nvme0n1) of your destination disk with dataRun
sudo gdisk -l <disk_identifier>(eg:sudo gdisk -l /dev/sda)MBR disks will output:
Partition table scan:
  MBR: MBR only
  BSD: not present
  APM: not present
  GPT: not present
GPT disks will output:
Partition table scan:
  MBR: protective
  BSD: not present
  APM: not present
  GPT: present
In macOS
Run
diskutil listCheck the destination drive
MBR disks will have:
   #:                       TYPE NAME                    SIZE       IDENTIFIER
   0:     FDisk_partition_scheme                        *SIZE GB   diskX
GPT disks will have:
   #:                       TYPE NAME                    SIZE       IDENTIFIER
   0:      GUID_partition_scheme                        *SIZE GB   diskX
Converting MBR to GPT
Note: if your drive is already GPT, then skip this section.
Destructive Conversion
This method will destroy all your data on your disk, making you a clean slate to work with. Only use this if the data in the disk is not important or backed up already! YOUR DATA WILL BE GONE WITH THIS METHOD.
You can use any partitioning tool of your choice and destroy the data, OR you can just boot macOS installer that you made with the OpenCore Dortania Guide and select the disk and format it. You can check Dualbooting on the same disk section for more information. You're not required to follow the rest of this section.
Non-Destructive Conversion
This method has higher chances of keeping your data intact, however this does NOT mean you can ignore backing up your data. BACKUP YOUR DATA!
We will be using gdisk ran on any linux distribution, I strongly NOT recommend using Windows or macOS gdisk to perform this operation as it may break seeing how Windows and macOS disk handling differs from Linux. You can use a USB distribution like gparted (lightweight iso/usb image) to do the manipulations or any distribution disk in hand (arch, Ubuntu, Fedora...).
Download/Install
gdiskfollowing you distributionRun
lsblkto check for the destination drive identifiersRun
sudo gdisk <identifier>(eg:sudo gdisk /dev/sda)If your disk is MBR, you'll be greeted with:
Partition table scan:
  MBR: MBR only
  BSD: not present
  APM: not present
  GPT: not present


***************************************************************
Found invalid GPT and valid MBR; converting MBR to GPT format.
THIS OPERATION IS POTENTIALLY DESTRUCTIVE! Exit by typing 'q' if
you don't want to convert your MBR partitions to GPT format!
***************************************************************


Command (? for help):
Type
wand press Enter/ReturnPress
yto confirmYou're done.
For those who want to other way around (from GPT to MBR) follow this answer.
Verification
Once your drive is converted, check again following the instruction above. You may want to reboot your computer before verifying.
Partitioning the Disk
Once you converted (or already formated) your disk is GPT, it is time to repartition it for macOS partition and the EFI partition if there isn't.
Checking the disk existing partitions
Just because the disk is now GPT partitioned, it doesn't mean that macOS will accept it, macOS's HFS Plus (Mac OS Journaled File System) or APFS won't accept formatting it and will return an error with MediaKit reports not enough space on device for requested operation, this is because either there is no EFI partition or it's not large enough. Either way, if you're just using a disk with non-OS data, chances are you do not have that partition and we will have to make one.
With that said, we still need to determine if it's required or not:
In Windows
- Open Disk Manager
- Check your destination disk
- In case your disk already contains an EFI partition: (usually if your disk was already GPT or formatted before)

- You'll see a description with
(EFI SYSTEM PARTITION) - The size of this partition is usually between 100MB and 500MB (any more and it's a waste of storage space)
- In case the size of it is <200MB, expand the partition to 200MB (or a bit more)
- In case the size of it is >500MB, shrink the partition to 500MB (or 200MB) because it's a waste of space
- In case you have multiple partitions with
EF00, that means your partitioning is bad, you only really need just 1 EFI partition in the whole system (if not per disk, there is no real need for multiple EFI partitions, makes no sense)
- You'll see a description with
- In case your disk doesn't contain an EFI partition:

- In case your disk already contains an EFI partition: (usually if your disk was already GPT or formatted before)
In Linux
Download/Install
gdiskfollowing you distrubutionRun
lsblkto check for the destination drive identifiersRun
sudo gdisk <identifier>(eg:sudo gdisk /dev/sda)When gdisk starts, send
pIn case your disk already contains an EFI partition: (usually if your disk was already GPT or formatted before)
Command (? for help): p Disk /dev/<identifier>: NUMBER sectors, SIZE GiB Model: SOME NAME Sector size (logical/physical): 512/512 bytes Disk identifier (GUID): SOME GUID Partition table holds up to 128 entries Main partition table begins at sector 2 and ends at sector 33 First usable sector is 34, last usable sector is 976773134 Partitions will be aligned on 8-sector boundaries Total free space is 10261 sectors (5.0 MiB) Number Start (sector) End (sector) Size Code Name 1 2048 800767 390.0 MiB EF00 EFI // We're interested in this 2 800808 213967975 101.6 GiB AF0A ... // Other partitions- You'll find a partition with code
EF00meaning it's marked as an EFI System Partition- The EFI partition does not need to be the first, it can be anywhere in the disk partitioning order, the
Codeof it is what matters the most
- The EFI partition does not need to be the first, it can be anywhere in the disk partitioning order, the
- The size of this partition is usually between 100MB and 500MB (any more and it's a waste of storage space)
- In case the size of it is <200MB, expand the partition to 200MB (or a bit more)
- In case the size of it is >500MB, shrink the partition to 500MB (or 200MB) because it's a waste of space
- In case you have multiple partitions with
EF00, that means your partitioning is bad, you only really need just 1 EFI partition in the whole system (if not per disk, there is no real need for multiple EFI partitions, makes no sense)
- You'll find a partition with code
In case your disk doesn't contain an EFI partition:
Command (? for help): p Disk /dev/<identifier>: NUMBER sectors, SIZE GiB Model: SOME NAME Sector size (logical/physical): 512/4096 bytes Disk identifier (GUID): SOME GUID Partition table holds up to 128 entries Main partition table begins at sector 2 and ends at sector 33 First usable sector is 34, last usable sector is NUMBER Partitions will be aligned on 2048-sector boundaries Total free space is 2669 sectors (1.3 MiB) Number Start (sector) End (sector) Size Code Name 1 2048 250068991 119.2 GiB 0700 peepee // a partition ... // Other partitions that are not EFIs- There are no
EF00partitions meaning we need to make one
- There are no
In macOS
Run
diskutil list- Optionally you can add
diskXwith X as the identifier of the target disk if you don't want a big list of partitions and disks shown up, in most cases the disk numbers change from a system boot to another, so don't rely on it too much.
- Optionally you can add
Check your destination disk listing:
In case your disk contain an EFI partition:
/dev/diskX (does not matter): #: TYPE NAME SIZE IDENTIFIER 0: GUID_partition_scheme *SIZE* diskX // GPT disk 1: EFI ESP 209.7 MB diskXs1 // Look for this 2: FORMAT1 Part1 *SIZE* diskXs2 // a partition ... // Other stuff that aren't TYPE: EFI- We see a partition with
TYPEasEFI, which means a disk with an EFI partition (and as you can see it's 200MB) - The size of this partition is usually between 100MB and 500MB (any more and it's a waste of storage space)
- In case the size of it is <200MB, expand the partition to 200MB (or a bit more)
- In case the size of it is >500MB, shrink the partition to 500MB (or 200MB) because it's a waste of space
- In case you have multiple partitions with
EF00, that means your partitioning is bad, you only really need just 1 EFI partition in the whole system (if not per disk, there is no real need for multiple EFI partitions, makes no sense)
- We see a partition with
In case your disk doesn't contain an EFI partition:
/dev/diskX (does not matter): #: TYPE NAME SIZE IDENTIFIER 0: GUID_partition_scheme *SIZE* diskX // GPT disk 1: Microsoft Basic Data poopoo 128.0 GB diskXs1 // a partition ... // Other stuff that aren't TYPE: EFI- There are no partitions with
TYPEasEFI, although the disk is GPT, meaning we need to make one.
- There are no partitions with
In case you have an EFI partition
Congratulations, you can go ahead and partition your disk for macOS and be on your merry way, check the Partitioning for macOS section.
In case you do not have an EFI partition
We'll have to make one, and the OSes that we will use will be either Windows or Linux (macOS is kind of a pain in the ass, not going to bother with it).
In Windows
We'll be using a disk managing software named Minitool Partition Wizard, ngl, it does look shady af and kind of like malware (and won't be surprised if it is). There are other alternatives like Easeus Partition Master (that suspiciously look like MPW 🤔) and AOMEI Partition Assistant (that also looks like the other two 🤔 intensifies), and many more but these are the most popular windows disk managers.
But where is muh GpArTeD?
The reason why I'm not recommending Gparted with NTFS partitions is that it might corrupt the partition easier than when Windows deals with it. I personally didn't have to deal much with corrupt NTFS partitions (I did once or twice) and Windows will surely fix them, but a lot of users reported unrecoverable partitions or data from using Gparted, not blaming Gparted, but using Windows with its own FS is safer than hoping ntfs-3g doesn't fuck up, that being said though, I'll post a Gparted guide below under Linux section, and if you already dealt with Gparted, I think you might know what to do.
In this section I'll be using MPW, the other tools are very similar and have very similar menus, you can follow up with them just fine. In this case, I will be using an external disk for the partitioning, it does not change anything about the internal disk, the same procedure goes for any disk.
Download the
malwarepartition manager of your choice (MPW here)Install the
malwarepartition manager and keep an eye on the adware and extra "apps" that they install, Chrome, Opera, some shady AV and so onRun the application as Administrator
Right Click on the target disk first partition and shrink it by 200MB (and bit more)

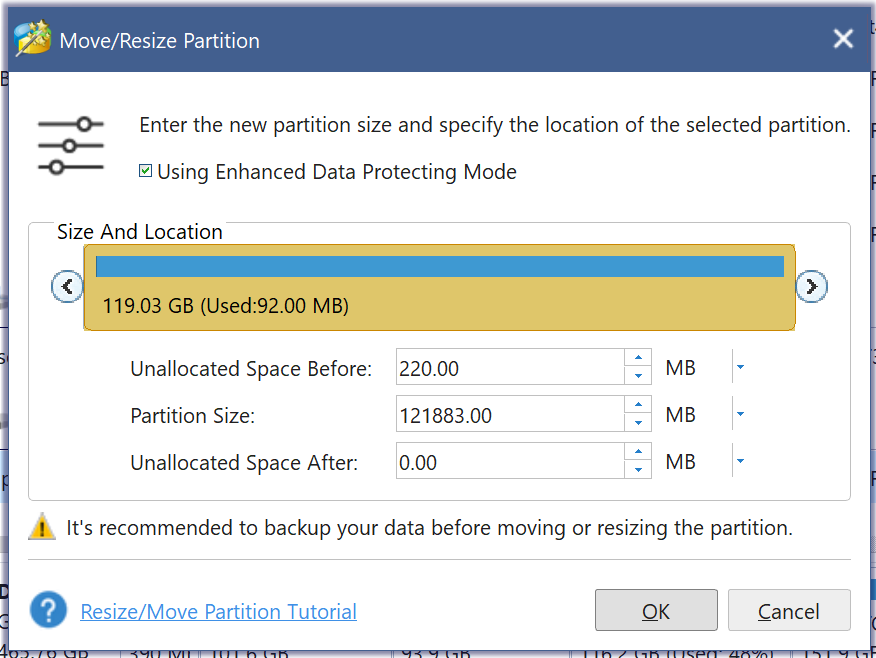
- Note: because of the trashy software, here is how to do it properly:
- change the size view from GB to MB
- select the partition size and press down arrow key on your keyboard to lower its value
- usually the Space After will be filled
- once you hit your mark (say 220MB) select the Unallocated Space After section and press down arrow key
- you'll see the Unallocated Space Before being filled
- Note2: Moving the big slider will just create weird numbers and it's trash, so deal with it
- Note3: I don't know if other partitioning software are this trash
- Note: because of the trashy software, here is how to do it properly:
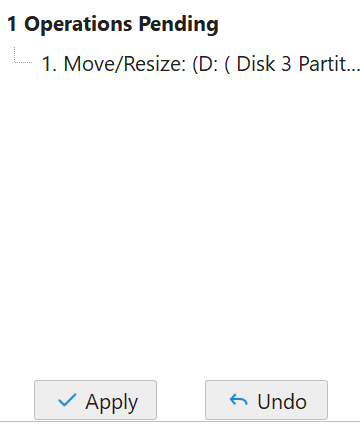
Once done, press apply on wherever the software shows you (in this version it's under the Operation Pending list, older releases had a dedicated button at the top of it, so check carefully the UI as it changes over time)
THIS PROCESS WILL TAKE TIME DEPENDING ON THE DATA ON YOUR DRIVE AND IF IT'S AN SSD OR A SPINNING RUST (HDD), DO NOT CANCEL IT UNDER ANY CIRCUMSTANCES OTHERWISE YOU'LL KILL YOUR DATA BYE BYE. YOU'VE BEEN WARNED!
You now have empty space before the first partition, this space will be used to create an EFI partition
- Due to MPW managers being assholes, creating an EFI partition is now a paid feature
- If you have an old version (9 or older) you can do that for free
Once the operations are done:
Open CMD/PowerShell with Administrator rights
Run
diskpartRun the following commands:
list disk- Will show your disks, check the destination disk carefully
- You can check Disk Manager as the disk numbering is the same
sel disk X- Where X is your destination disk number
list part- Will list partitions on that selected disk
- Check the partitions as it may help you check for the destination
- If it's not the desired disk, use
sel disk Xagain and choose another one and check again
create partition efi- Will create a new partition of EFI type
- This will make it hidden on the system and can only be explored with administrator privileges
- It will take up the whole free space we made earlier
list part- You'll see a new partition with Type
System - The size should roughly match the one we left earlier
- You'll see a new partition with Type
format fs=fat32 label="EFI"- this will format that partition as FAT32 and give it the label "EFI"
- Note: in some cases windows will return an error that
The device is not ready, I'm not sure what could that be but we can fix it - Fix of Note:
- Go back to MPW
- Right click on the EFI partition (should be also detected as
EFI System Partition) and select Format 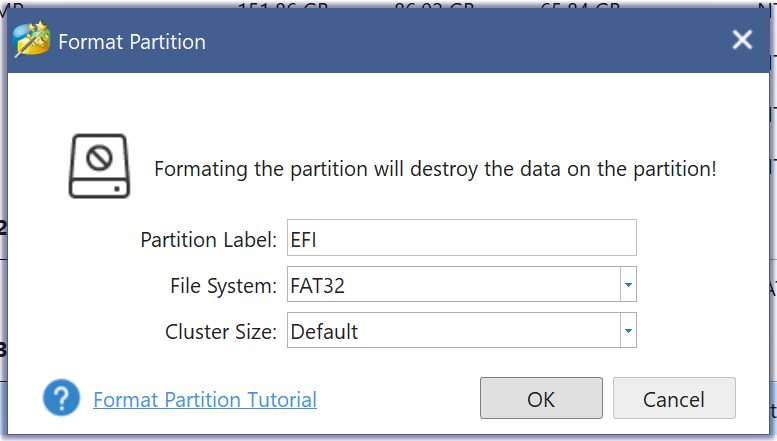
- Press OK and be done with it.
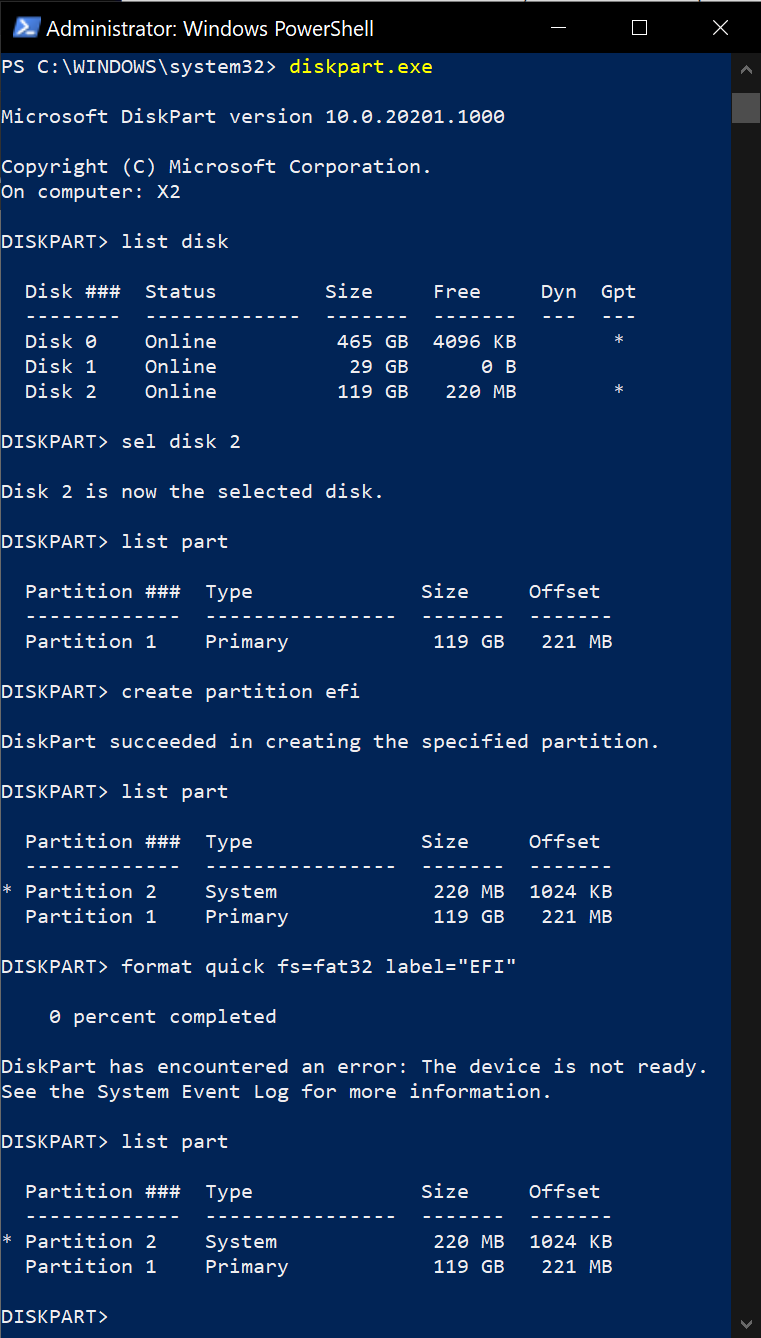
Example of the output:
Once done you can go to Partitioning for macOS
In Linux (my favourite)
We'll be using your favorite tool Gparted, if you're using parted/gpart, you're looking for a sad day. Let's get going.
Install
gpartedfollowing your distribution instructions (or use GParted ISO)Run
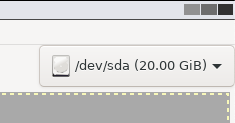
gpartedSelect the destination disk from the list on the right
Right click on the first partition then select Resize/Move

Select the Free space preceding text zone and press up arrow key until you get to the desired size then hit Resize/Move
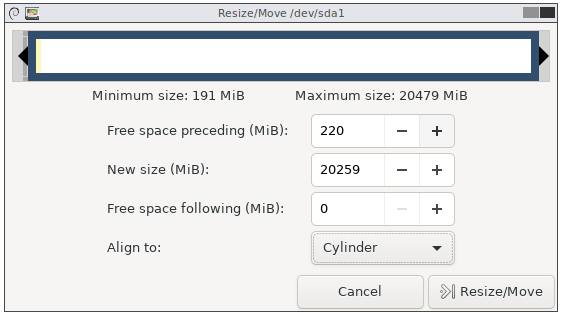
- Note that if you went over the desired size then subtracted the extra amount, it will be moved to the free space following the partition, in this case just press
+on the New size area until the space following zeros out, going for even more will decrease the free space preceding (logic, right? just don't mess up too much, thanks)
- Note that if you went over the desired size then subtracted the extra amount, it will be moved to the free space following the partition, in this case just press
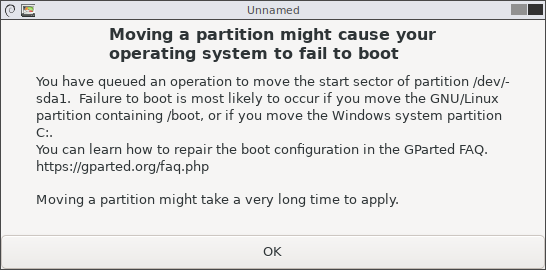
You'll get this error, press OK, this matters if you have multiple partitions but usually most modern OSes (on UEFI) are quite resilient to this issue (by using UUIDs instead of partition numbering)
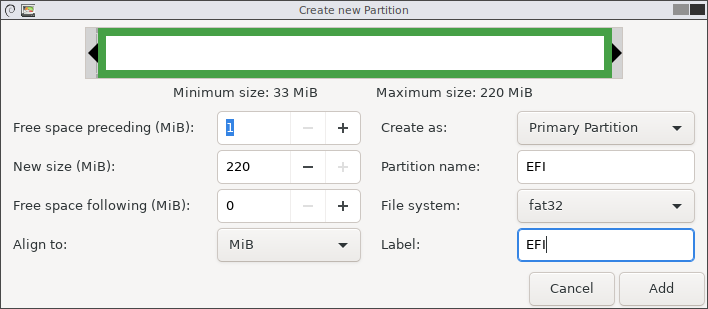
Right click on the unallocated partition and select New

In the Create new Partition box, set the following then press Add
- Partition name (could be named EFI, it doesn't matter)
- Label (could be named EFI, it doesn't matter)
- File system: FAT32
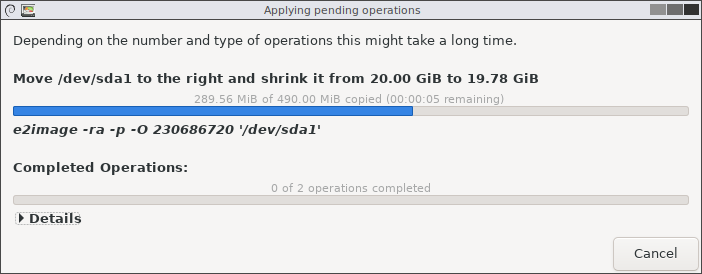
Press the green check mark on the toolbar to Apply Changes and confirm them
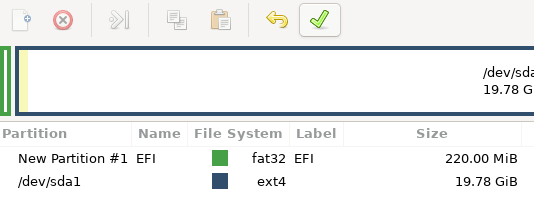
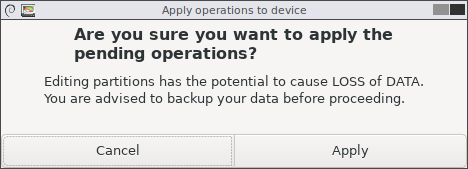
THIS PROCESS WILL TAKE TIME DEPENDING ON THE DATA ON YOUR DRIVE AND IF IT'S AN SSD OR A SPINNING RUST (HDD), DO NOT CANCEL IT UNDER ANY CIRCUMSTANCES OTHERWISE YOU'LL KILL YOUR DATA BYE BYE. YOU'VE BEEN WARNED!
Once done, right click on your newly created EFI partition and select "Manage Flags"
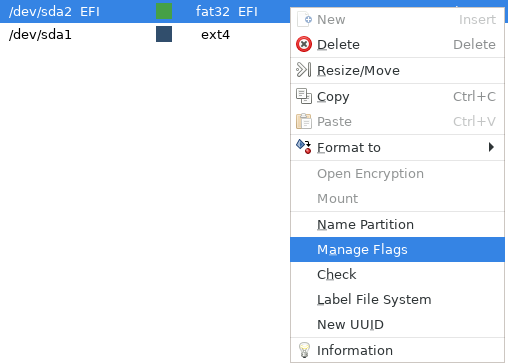
Select
esp, gparted will selectbootautomatically, keep it that way
It will be done instantly, check your flags

- You can also check in
gdiskforEF00
- You can also check in
Once done you can go to Partitioning for macOS