Fixing CFG Lock
This guide is only recommended for users who have already installed macOS, for users who are installing for the first time enable AppleCpuPmCfgLock and AppleXcpmCfgLock under Kernel -> Quirks
- Note that this guide is only applicable for Intel users. AMD users don't have any type of CFG Lock
What is CFG-Lock
CFG-Lock is a setting in your BIOS that allows for a specific register(in this case the MSR 0xE2) to be written to. By default, most motherboards lock this variable with many even hiding the option outright in the GUI. And why we care about it is that macOS actually wants to write to this variable, and not just one part of macOS. Instead both the Kernel (XNU) and AppleIntelPowerManagement want this register.
So to fix it we have 2 options:
1. Patch macOS to work with our hardware
- This creates instability and unnecessary patching for many
- The 2 patches we use for this:
AppleCpuPmCfgLockfor AppleIntelPowerManagement.kextAppleXcpmCfgLockfor the Kernel(XNU)
2. Patch our firmware to support MSR E2 write
- Very much preferred, as avoids patching allowing for greater flexibility regarding stability and OS upgrades
Note: Penyrn based machines actually don't need to worry about unlocking this register
Checking if your firmware supports CFG Lock unlocking
Before proceeding with the rest of this guide, you'll first need to check if your firmware supports CFG Lock unlocking. To check it, you can proceed into two ways:
- Use the DEBUG version of OpenCore and check what the log says about CFG Lock
- Use a tool called
ControlMsrE2which will speed up the whole checking process
Checking via OpenCore logs
For users who prefer using DEBUG release, you'll want to enable the DEBUG variant of OpenCore with Target set to 67 and boot OpenCore. This should provide you with a file in the format of opencore-YYYY-MM-DD-hhmmss.txt on the root of the drive.
Within this file, search for OCCPU: EIST CFG Lock:
OCCPU: EIST CFG Lock 1
If it returns 1, then you proceed with this guide here: Disabling CFG Lock.
Otherwise(ie. 0), no reason to continue and you can simply disable Kernel -> Quirks -> AppleCpuPmCfgLock and Kernel -> Quirks -> AppleXcpmCfgLock.
Checking via ControlMsrE2
To start, download ControlMsrE2 and add this tool inside EFI/OC/Tools and config.plist(this can be done with ProperTree's snapshot function(ie. Cmd+R)). Next, boot OpenCore and select the ControlMsrE2.efi entry. This should provide you one of the following:
- CFG-Lock is enabled:
This firmware has LOCKED MSR 0xE2 register!
- CFG-Lock is disabled:
This firmware has UNLOCKED MSR 0xE2 register!
For the former, please continue here: Disabling CFG Lock.
For the latter, you don't need to do any CFG-Lock patches and can simply disable Kernel -> Quirks -> AppleCpuPmCfgLock and Kernel -> Quirks -> AppleXcpmCfgLock.
Disabling CFG Lock
So you've created the EFI folder but you can't still boot without unlocking before CFG Lock. In order to do this you'll need the following:
Inside your EFI/OC/Tools folder and config.plist, add the following tool(this can be done with ProperTree's snapshot function(ie. Cmd+R)):
And some apps to help us out:
- UEFITool (Make sure it's UEFITool and not UEFIExtract)
- Universal-IFR-Extractor
And the final part, grabbing your BIOS from the vendors' website.
Now the fun part!
Turning off CFG-Lock manually
Please note that the only firmwares that can be directly opened by UEFITool are ASUS, MSI and ASRock. Other firmwares need a special procedure which we'll not directly cover into this guide. For Dell firmwares, please refer to dreamwhite's guide
- Open your firmware with UEFITool and then find
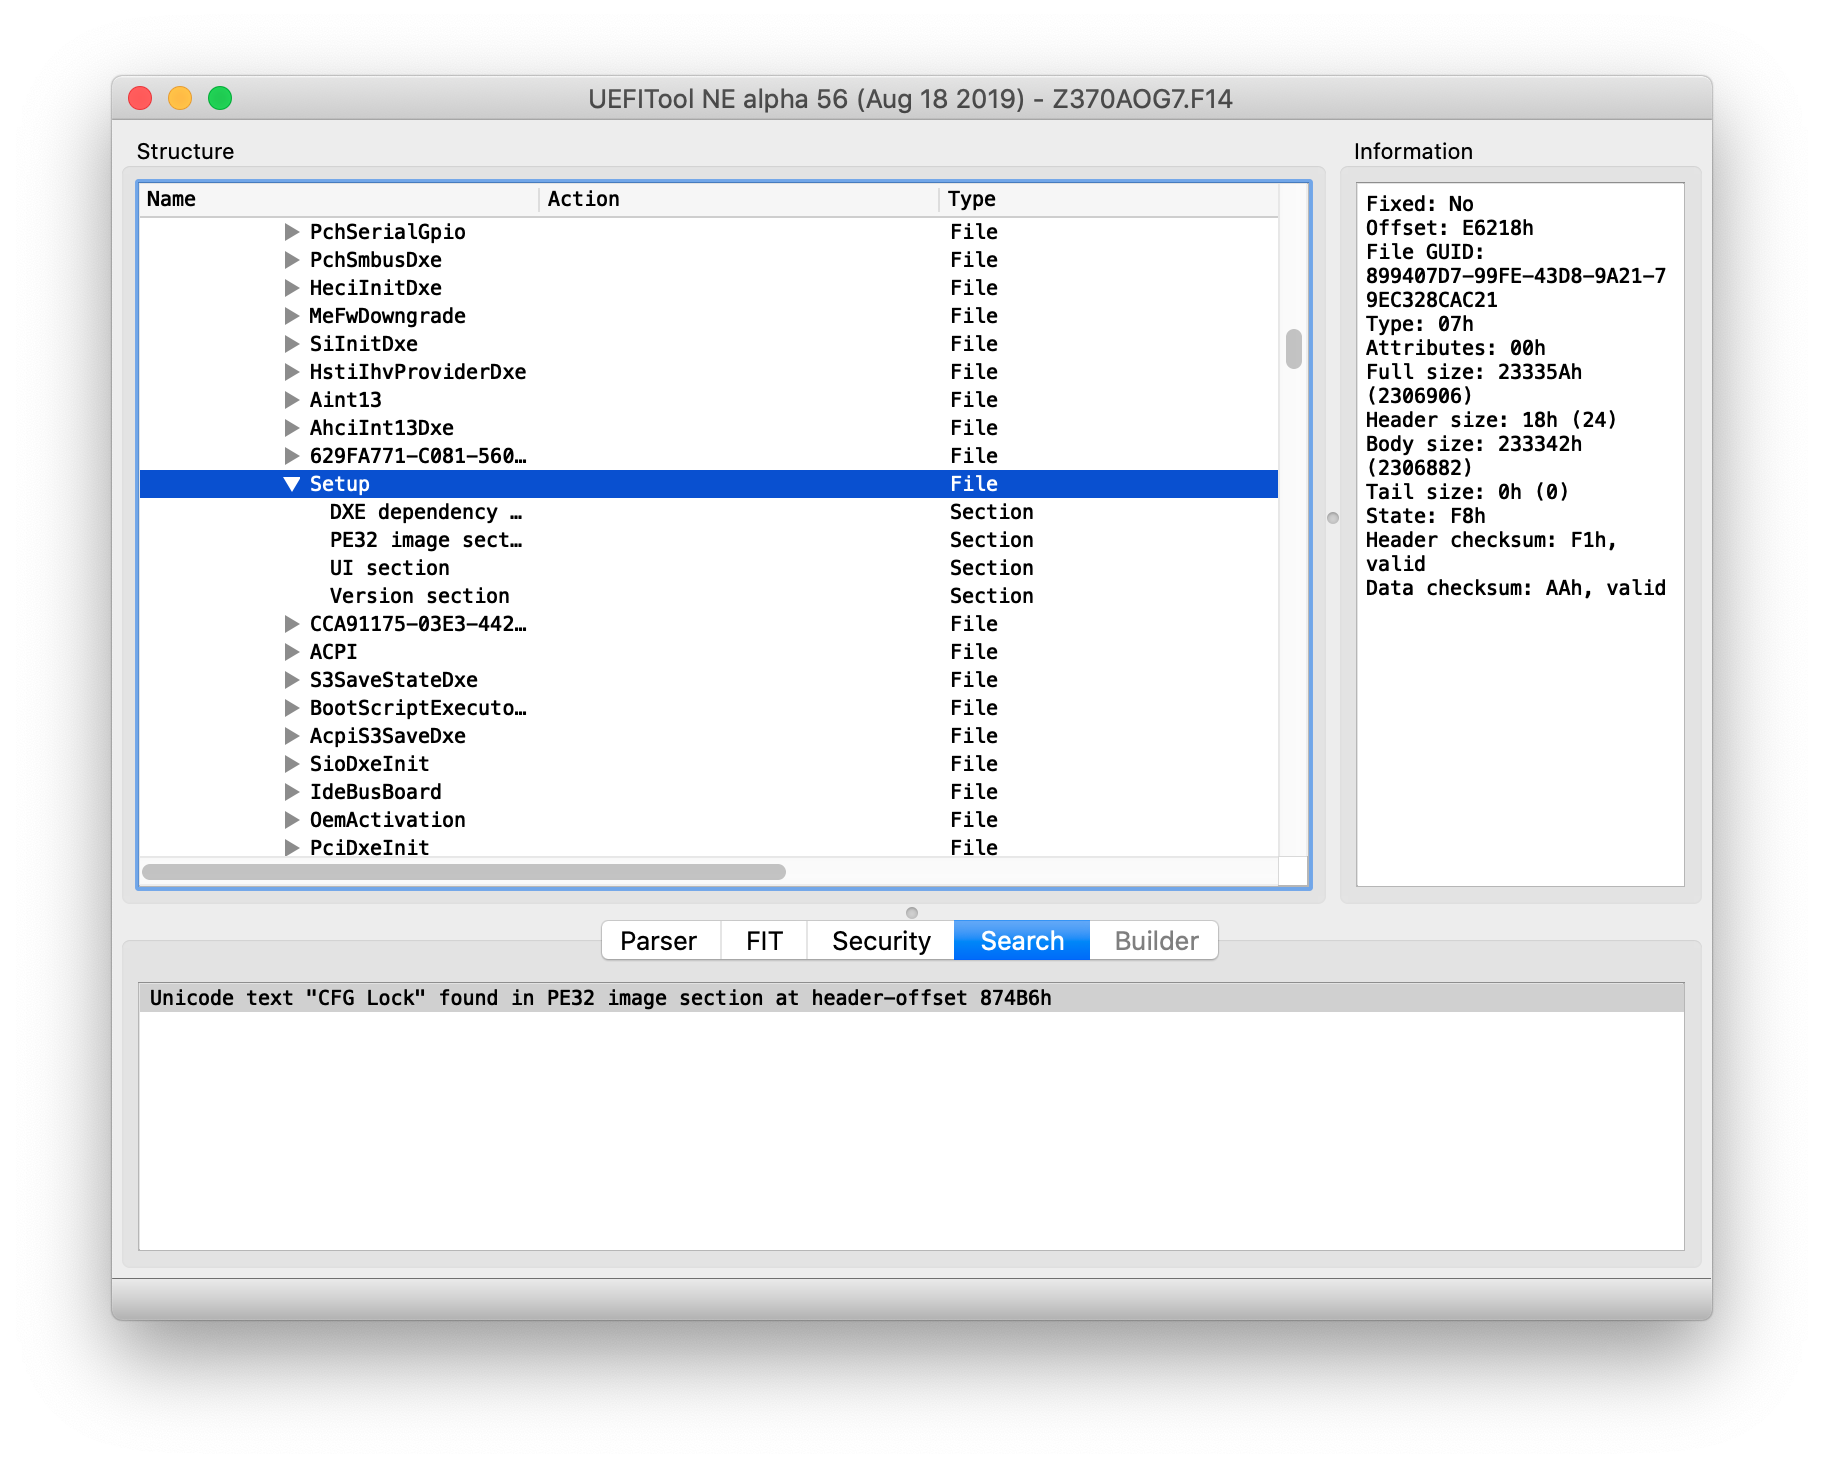
CFG Lockas a Unicode string. If nothing pops up then your firmware doesn't supportCFG Lock, otherwise continue on.

You'll find that this string is found within a Setup folder, right-click and export as
Setup.bin(or evenSetup.sct)Open your setup file with
ifrextractand export as a .txt file with terminal:path/to/ifrextract path/to/Setup.bin path/to/Setup.txtOpen the text file and search for
CFG Lock, VarStoreInfo (VarOffset/VarName):and note the offset right after it (ie:0x43) and the VarStore ID right after the offset (ie:0x3)
Search for
VarStoreId: 0x3where0x3is replaced with the value of the VarStoreId you found and note theNameafter it (ie:CpuSetup)

Run the Modified GRUB Shell and write the following command where
CpuSetupis replaced with the VarStore Name you've previously extracted and0x43is replaced with the offset you've previously extracted:setup_var_cv CpuSetup 0x43 0x01 0x00
At this point, run either reboot in the shell or simply reboot your machine. And with that, you should have CFG Lock unlocked! To verify, you can run over the methods listed at Checking if your firmware supports CFG Lock unlocking to verify whether the variable was set correctly then finally disable Kernel -> Quirks -> AppleCpuPmCfgLock and Kernel -> Quirks -> AppleXcpmCfgLock.
- Do note that variable offsets are unique not just to each motherboard but even to its firmware version. Never try to use an offset without checking.
And you're done! Now you'll have correct CPU power management
Note: Every time you reset your BIOS you will need to flip this bit again, make sure to write it down with the BIOS version so you know which.
Note 2: Some OEMs like Lenovo may have the variable set but cannot unlock it without physically modding the BIOS, for these situations you may need to use a tool like RU: CFG LOCK/Unlocking - Alternative method
