
Emulated NVRAM
So this section is for those who don't have native NVRAM, the most common hardware to have incompatible native NVRAM with macOS are X99 and some X299 series chipsets:
- X99
- X299
For B360, B365, H310, H370, Z390 users, make sure you have SSDT-PMC both under EFI/OC/ACPI and config.plist -> ACPI -> Add. For more info on making and compiling SSDTs, please see Getting started with ACPI
Note
10th gen CPUs do not need this SSDT
Cleaning out the Clover gunk
So some may not have noticed but Clover may have installed RC scripts into macOS for proper NVRAM emulation. This is an issue as it conflicts with OpenCore's method of emulation.
Files to delete:
/Volumes/EFI/EFI/CLOVER/drivers64UEFI/EmuVariableUefi-64.efi/Volumes/EFI/nvram.plist/etc/rc.clover.lib/etc/rc.boot.d/10.save_and_rotate_boot_log.local/etc/rc.boot.d/20.mount_ESP.local/etc/rc.boot.d/70.disable_sleep_proxy_client.local.disabled/etc/rc.shutdown.d/80.save_nvram_plist.local
If folders are empty then delete them as well:
/etc/rc.boot.d/etc/rc.shutdown.d
Verifying if you have working NVRAM
To start, open the terminal and run the following one line at a time:
sudo -s
nvram -c
nvram myvar=test
exit
Now reboot and run this:
nvram -p | grep -i myvar
If nothing returns then your NVRAM is not working. If a line containing myvar test returns, your NVRAM is working.
Note: nvram -c requires SIP to be off, an alternative is to wipe NVRAM at the boot menu. Reminder you'll need Misc -> Security -> AllowNvramReset -> YES
Enabling emulated NVRAM (with a nvram.plist)
To enable emulated NVRAM, you'll need 3 things set:
Within your config.plist:
- Booter:
DisableVariableWrite: set toNO
- Misc -> Security:
ExposeSensitiveData: set to0x3
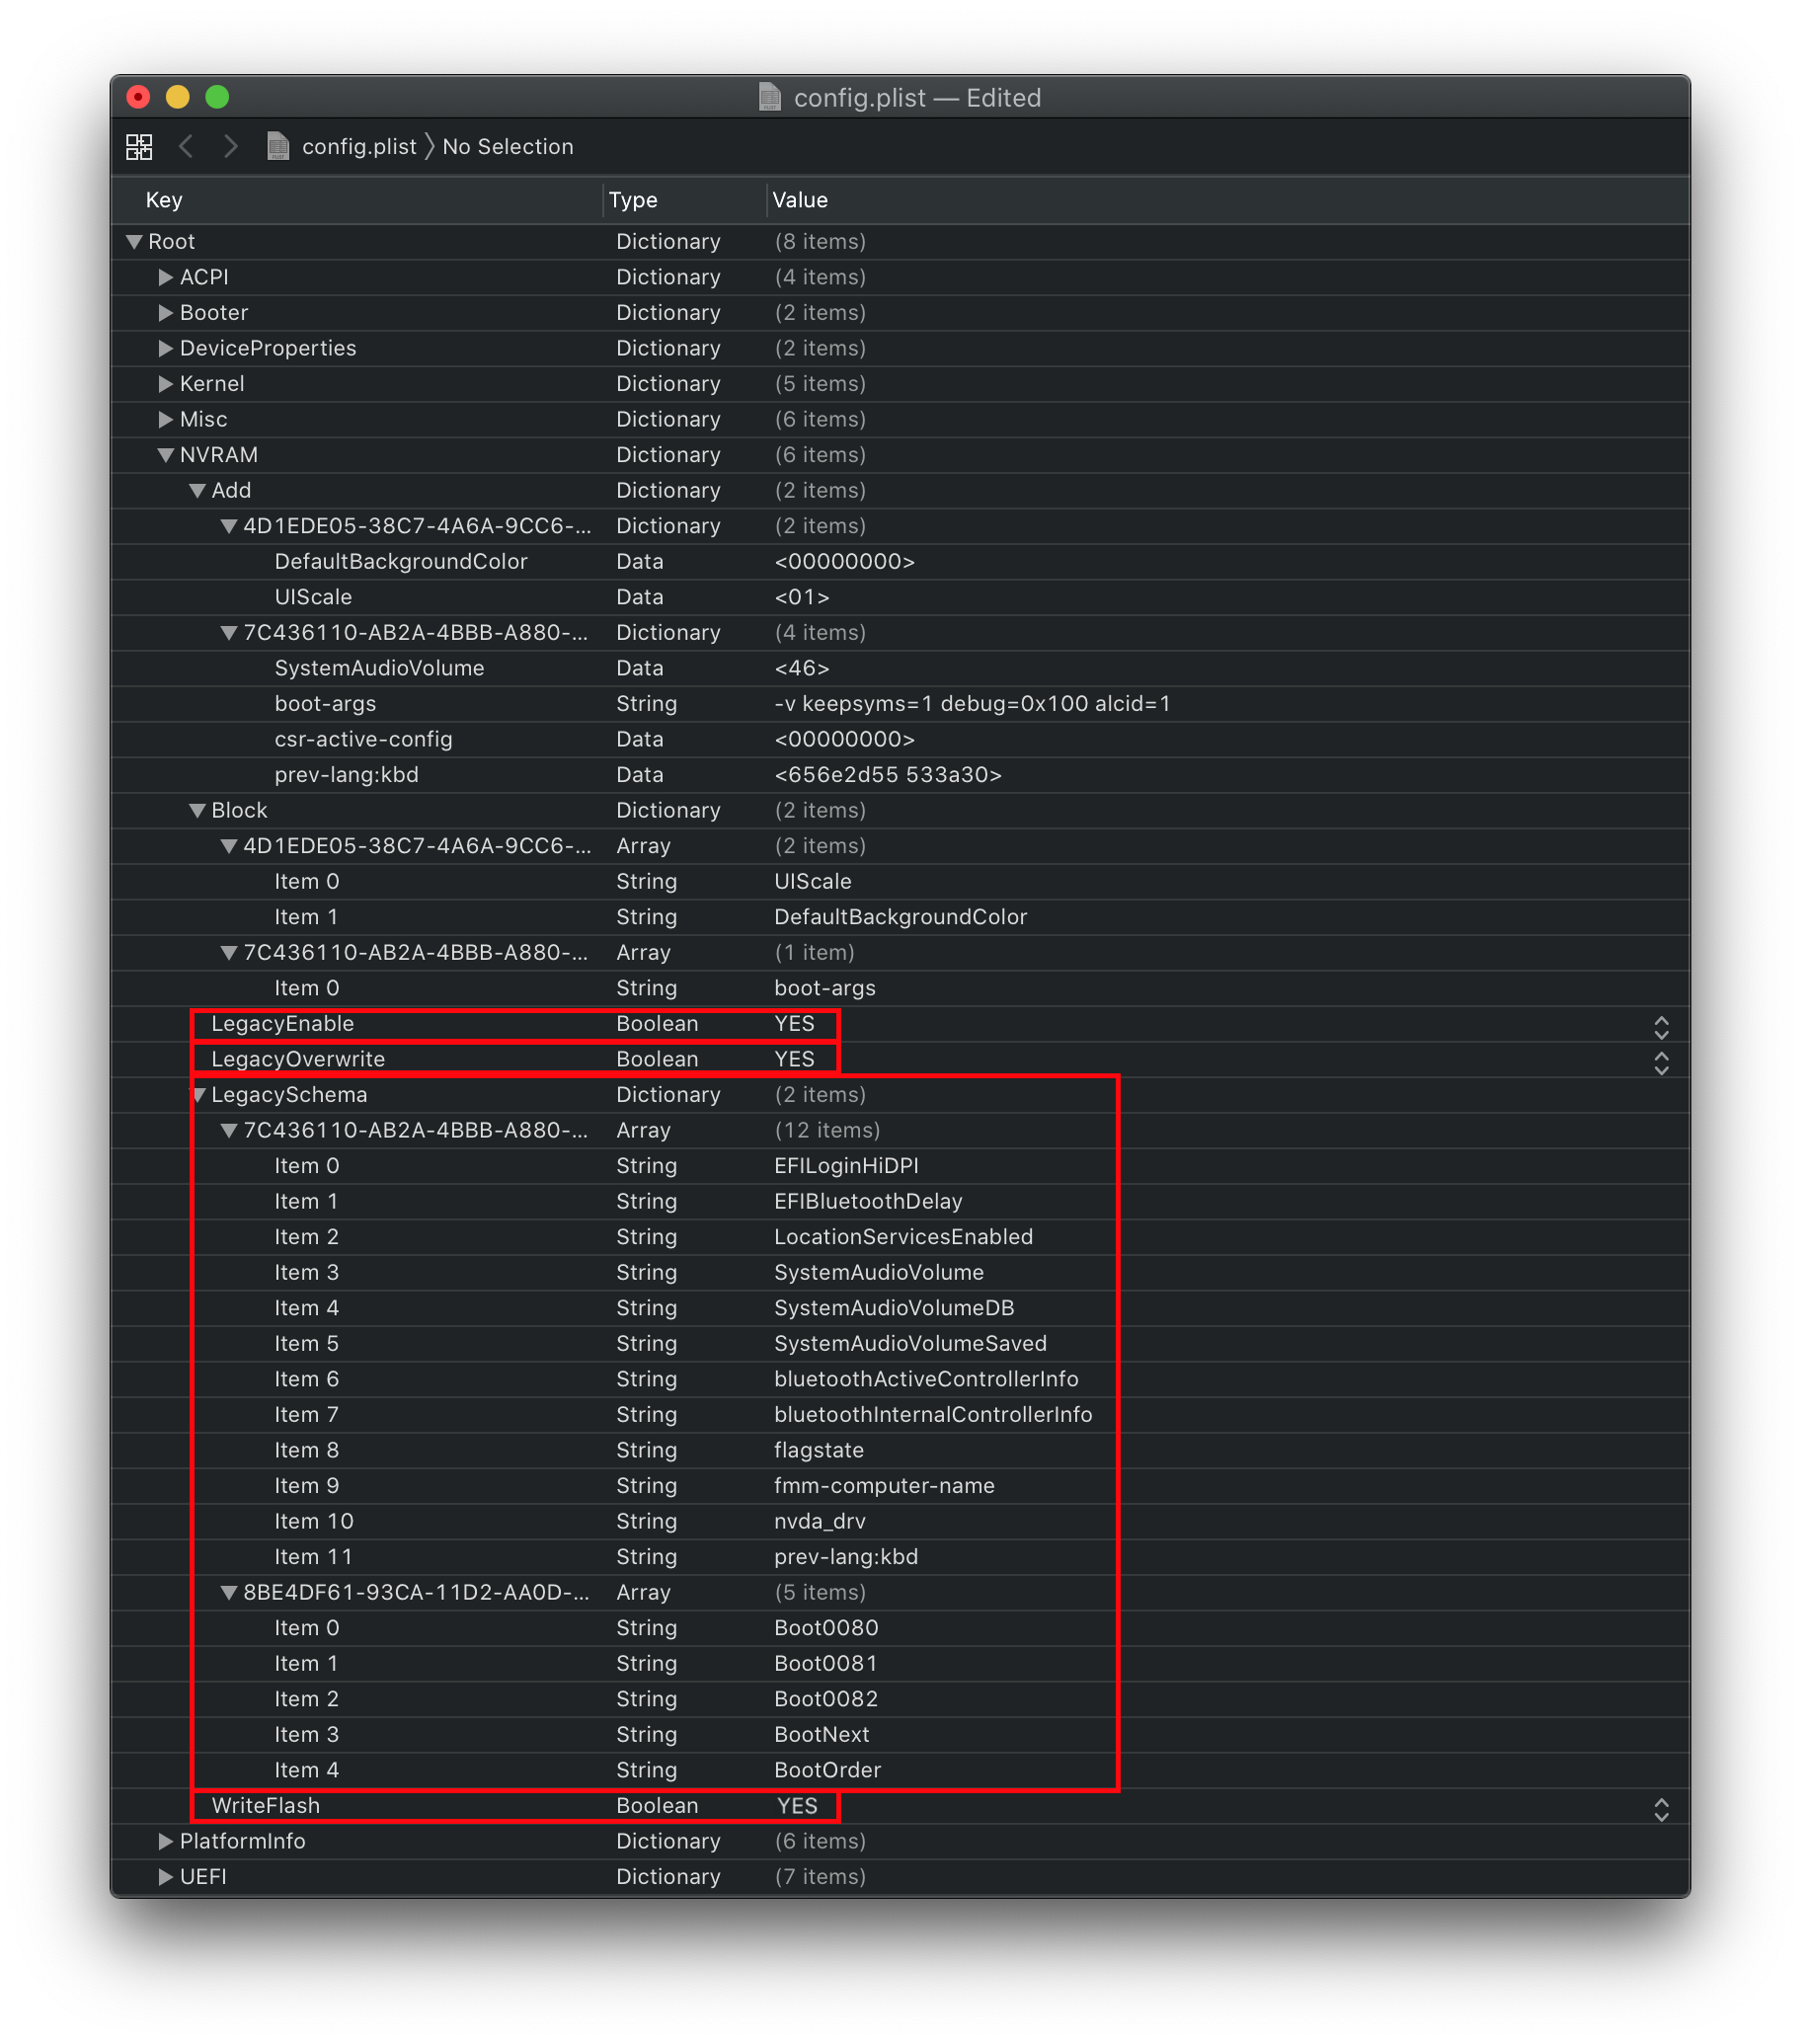
- NVRAM:
LegacyEnable: set toYESLegacyOverwriteset toYESLegacySchema: NVRAM variables set(OpenCore compares these to the variables present in nvram.plist)WriteFlash: set toYES
And within your EFI:
OpenRuntime.efidriver(this is needed for proper sleep, shutdown and other services to work correctly
Now grab the 'LogoutHook.command'(Inside /Utilities/LogoutHook/) and place it somewhere safe (e.g. within your user directory, as shown below):
/Users/$(whoami)/LogoutHook/LogoutHook.command
Open up terminal and run the following:
sudo defaults write com.apple.loginwindow LogoutHook /Users/$(whoami)/LogoutHook/LogoutHook.command
And voila! You have emulated NVRAM!
Do keep in mind this requires the nvram command to support the -x flag for this to work correctly which is unavailable on macOS 10.12 and below. If you are installing macOS 10.12 or earlier, you need to copy nvram.mojave into the same folder as LogoutHook.command, which fixes this by invoking it instead of the system nvram command.
Something else to note is that macOS is only able to read nvram.plist but it won't be able to write to nvram.plist unless running the shutdown process. This means running the test above won't work