
Fixing Backlight (SSDT-PNLF)
What this SSDT does
The purpose of this SSDT is to create a PNLF device for macOS to play with, specifically one with a hardware ID of APP0002. Luckily WhateverGreen will handle the rest of the work for us.
Methods to make this SSDT
For the backlight fix, there are 2 methods you can choose from:
Prebuilt
By far the easiest method, all you need to do is download the following file:
Main things to note with this method:
- Assumes GPU pathing, works great for 99% of devices but if you're having issues controlling backlight this may be something to look at
- Doesn't really teach you anything
- For most, this doesn't matter. But to some knowing what makes your hackintosh tick is part of the journey
Manual
Finding the ACPI path
On MacOS
Unfortunately there is no guidance for this yet. Try on Linux or Windows.
On Linux
These steps work on Ubuntu and may work on other distros. If not then try the procedure for Windows.
Use the lspci command to get your display adapters PCI identification number.
The output here will be different on your system!
For this guide, we're gonna assume Windows is already on this laptop, as otherwise creating this SSDT is a bit more difficult.
# lspci -D
0000:00:00.0 Host bridge: Intel Corporation 440FX - 82441FX PMC [Natoma] (rev 02)
0000:00:01.0 ISA bridge: Intel Corporation 82371SB PIIX3 ISA [Natoma/Triton II]
0000:00:01.1 IDE interface: Intel Corporation 82371AB/EB/MB PIIX4 IDE (rev 01)
0000:00:02.0 VGA compatible controller: VMware SVGA II Adapter
0000:00:03.0 Ethernet controller: Intel Corporation 82540EM Gigabit Ethernet Controller (rev 02)
0000:00:04.0 System peripheral: InnoTek Systemberatung GmbH VirtualBox Guest Service
Search the output for an entry that looks like your display adapter. E.g: In this example we have VGA compatible controller with PCI number 0000:00:02.0. The format of this number is domain:bus:device:function.
Now use this command from a Terminal to find the ACPI path for your display adapter# cat /sys/class/pci_bus/<domain:bus>/device/<domain:bus:device:function>/firmware_node/path
For example
# cat /sys/class/pci_bus/0000:00/device/0000:00:02.0/firmware_node/path
\_SB_.PCI0.GFX0  <-- The ACPI path
Further details at this link.
On Windows
Open DeviceManager, and head to the following:
Device Manager -> Display Adapters -> Properties -> Details > BIOS device name
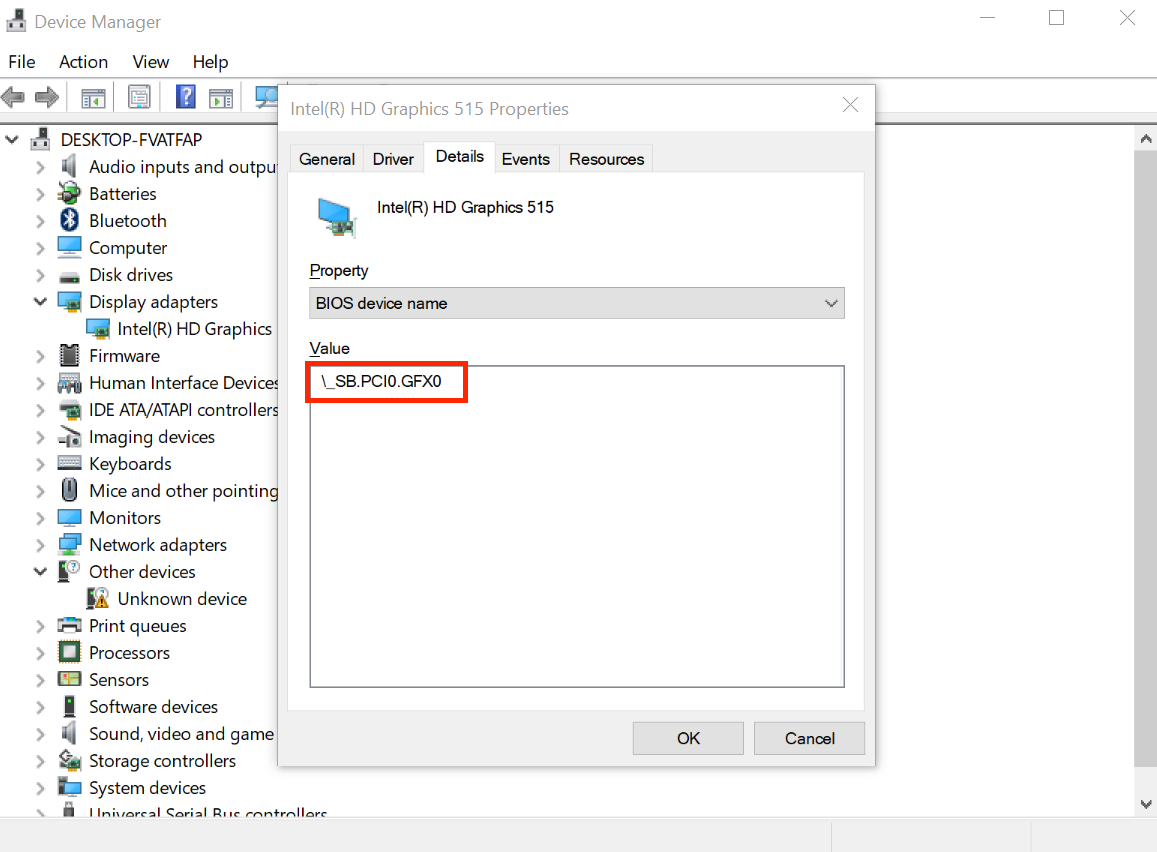
From the above example, we can see our display is hooked up to \_SB.PCI0.GFX0
Edits to the sample SSDT
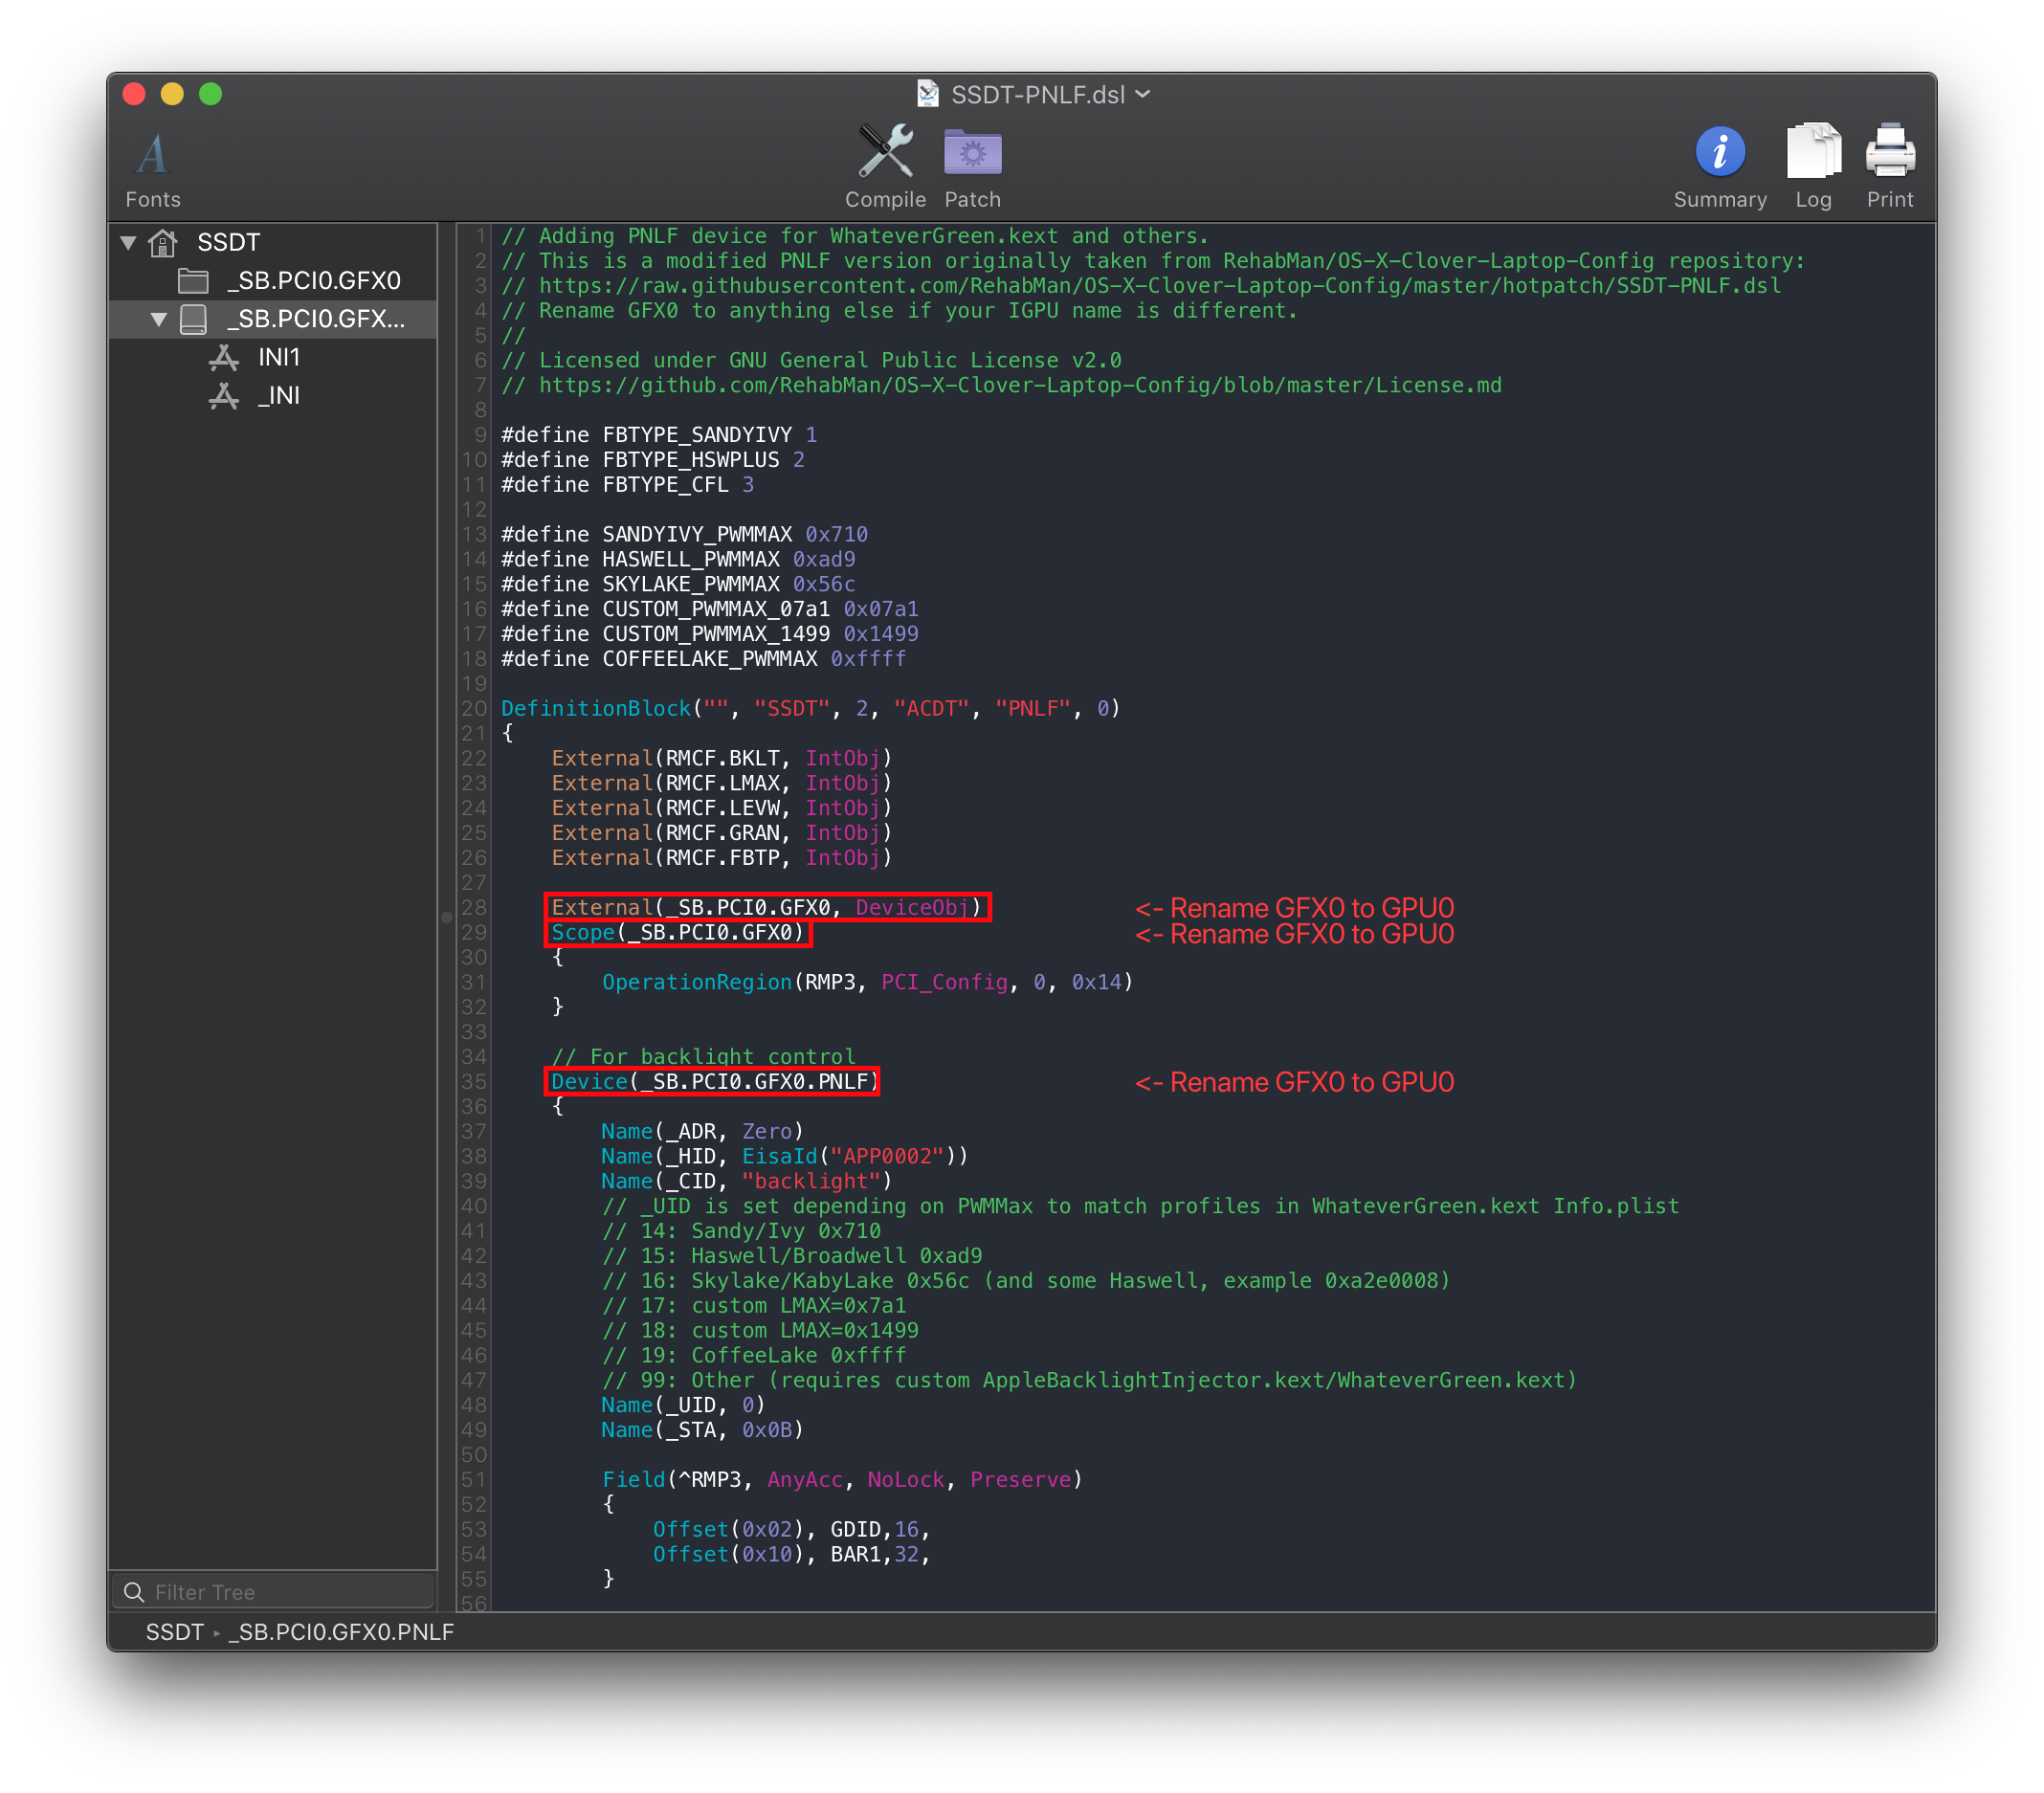
Now that we have our ACPI path, lets grab our SSDT and get to work:
By default, this uses \_SB.PCI0.GFX0 for the pathing. you'll want to rename accordingly. For this example, we'll assume your pathing is \_SB.PCI0.GPU0:
External (_SB_.PCI0.GFX0, DeviceObj) <- Rename this

Scope (_SB.PCI0.GFX0) <- Rename this

Device(_SB.PCI0.GFX0.PNLF) <- Rename this
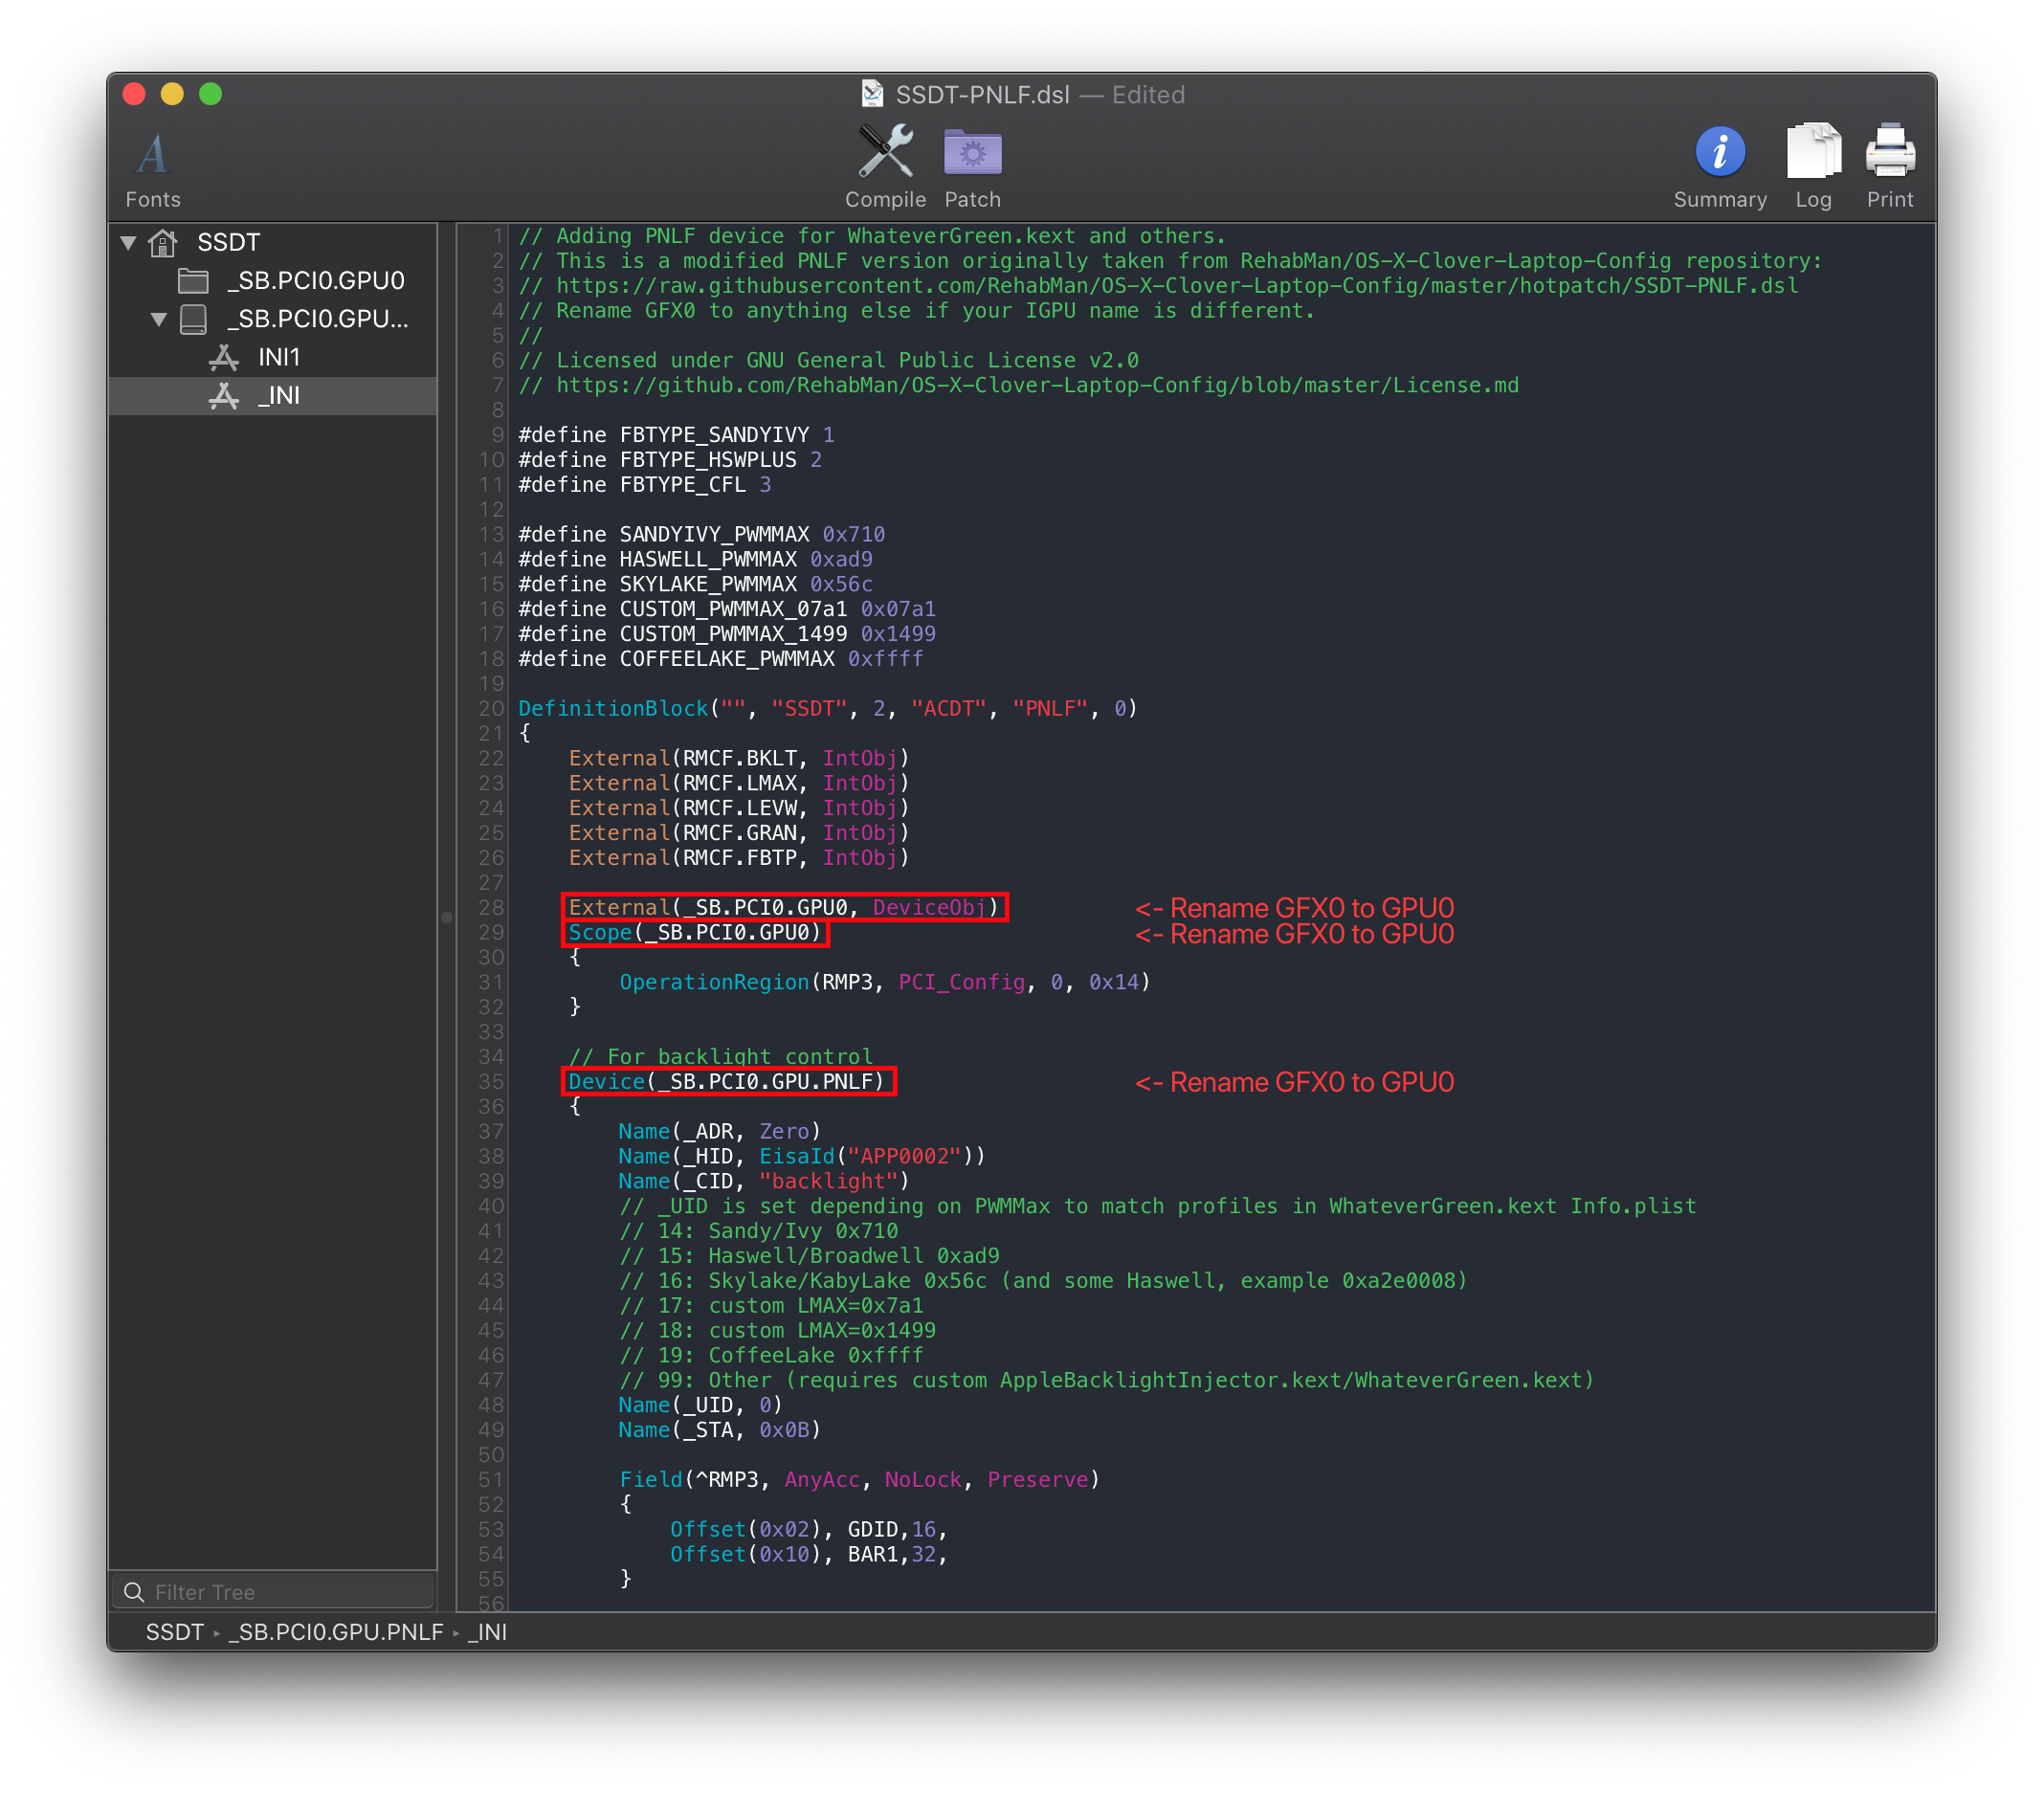
Following the example pathing we found, the SSDT should look something like this:
External (_SB_.PCI0.GPU0, DeviceObj) <- Renamed

Scope (_SB.PCI0.GPU0) <- Renamed

Device(_SB.PCI0.GPU0.PNLF) <- Renamed
Compiling the SSDT
With the SSDT done, you're now ready to compile the SSDT!
Wrapping up
Once you're done making your SSDT, either head to the next page to finish the rest of the SSDTs or head here if you're ready to wrap up: